How to re-create a DVD from one or more VOB files on my hard drive
In this article we start from one or more VOB files that were recovered with IsoBuster from a Movie DVD. Only the VOB files are usable as input files, IFO and BUP files can be discarded.
This article is mainly based on and inspired by an article on the videohelp.com website. To be able to do the task we need two free third party tools, IfoEdit and VobEdit, that can be downloaded from the internet.
The resulting DVD will contain one large Video sequence, no chapters nor menus, skipping can be done per 5 minutes.
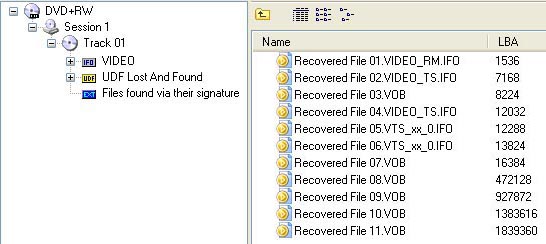
As example we use the VOB files that were found based on their signature. See the last example of the first article in this series:
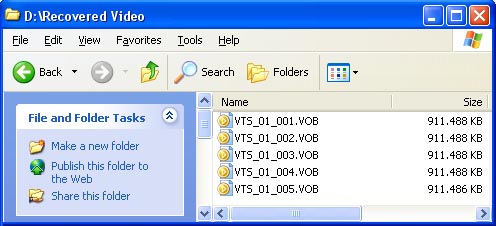
After checking and removing the first (smaller) VOB file (see mentioned article to understand why) we have 5 VOB files left. To be able to use Vobedit properly we need to rename the extracted VOB files like this: VTS_01_001.VOB, etc. It's very important for this tool that the file ends with double zero and then a consecutive number starting with 1, so _001.VOB, _002.VOB, _003.VOB and so on.
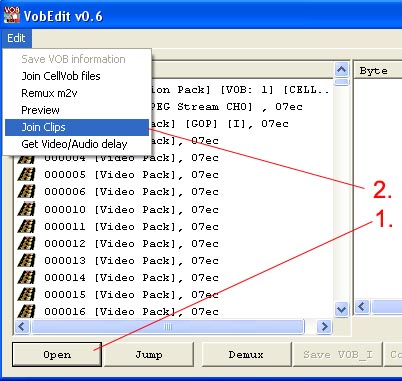
Now start up VobEdit.
- Click the Open button and open the first VOB file (VTS_01_001.VOB).
- Next, click Edit and select Join Clips.
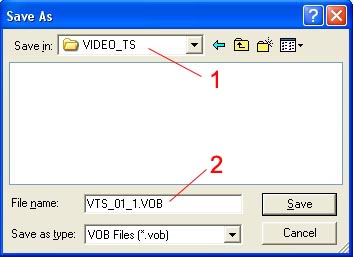
- Next choose or create a new folder and preferably name it VIDEO_TS.
- Use the proposed name of VTS_01_1.VOB.
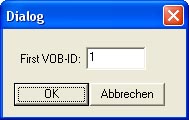
- In the next dialog box, check that the number is 1 and next click OK.
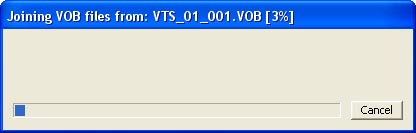
VobEdit will now convert the renamed (_001,...) VOB files to VTS_01_1.VOB etc. The resulting VOB file(s) may be combined in one file, the sizes can be altered or there can be more files, it all depends.
After this process you end up with one or more new VOB files in a VIDEO_TS folder, which are also already named correctly, so that they can be used later on to produce a new Movie DVD.
Now it's time to start up IfoEdit.
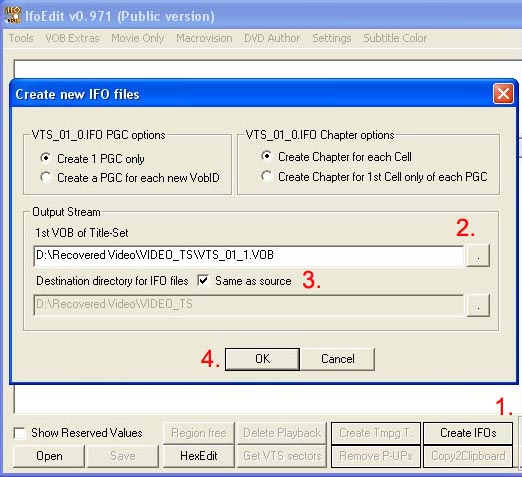
- Click the Create IFOs button.
- Open the first VTS_01_1.VOB file which was produced by VobEdit.
- Make sure that the Same as source checkbox is checked!
- Click OK.
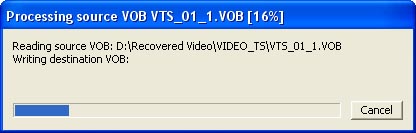
IfoEdit will now create the IFO and BUP files:
After the process is done you will see two lines in the top pane of IfoEdit:
VIDEO_TS.IFO and VTS_01.0.IFO.
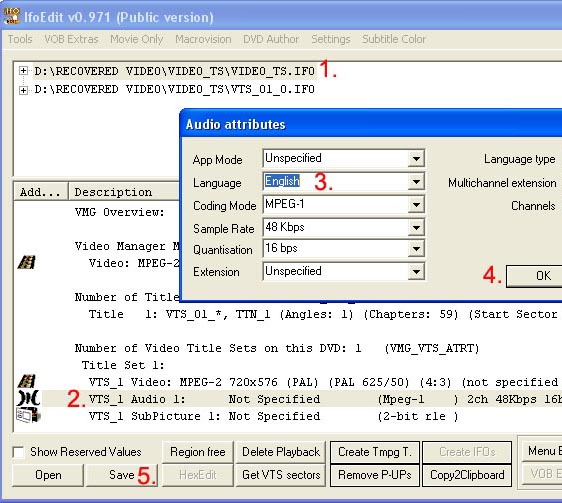
- Click the first line. Content will be displayed in the second (bottom) pane.
- In the bottom pane, click the line that says VTS_1 Audio..., this triggers a popup dialog.
- In the dialog, change the Language to English.
- Click the OK button on the dialog.
- Save and confirm when asked to overwrite.
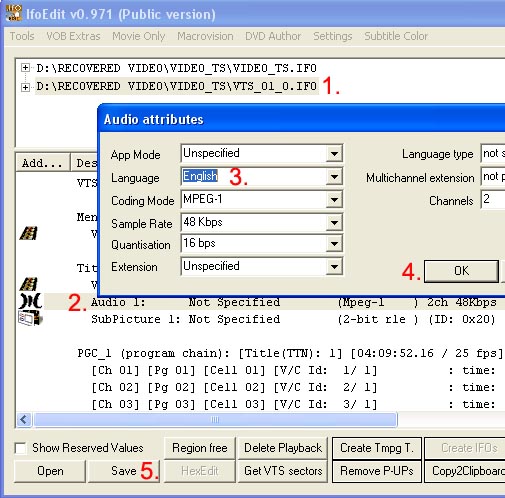
Repeat the same process again, but this time for the second line:
- Click the second line. Content will be displayed in the second (bottom) pane.
- In the bottom pane,double click the line that says Audio 1:... which triggers a dialog to popup.
- In the dialog, change the Language to English.
- Click the OK button on the dialog.
- Save and confirm when asked to overwrite.
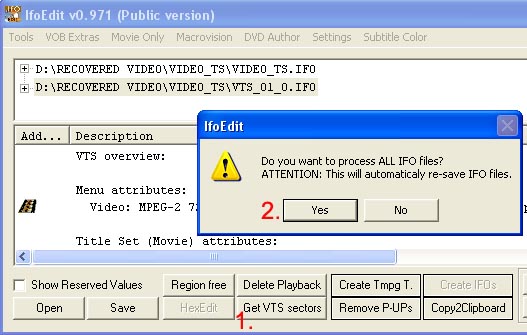
As a last step:
- Click the button Get VTS sectors.
- Select Yes to process all IFO files when prompted.
You can now close IfoEdit. The result is a full set of IFO, BUP and VOB files in a VIDEO_TS folder on your HD. This set of files is (or should be) suitable to be burned with a standard write application, such as Nero for instance.
If you want to burn this set of files to a DVD with the intention to create a playable VIDEO DVD, then read this article:
You may always share your own expertise and experience to help improve these articles!