Starten met IsoBuster
IsoBuster gebruiken is eigenlijk eenvoudig. U hoeft slechts een paar dingen te weten :
Wanneer u een station of een imagebestand selecteert, wordt de media automatisch gescand. De Session-, Track-, Partition- en Bestandssysteem-inhoud wordt onmiddellijk weergegeven.
Als u niet meteen iets ziet , betekent dit dat IsoBuster niets kon detecteren of dat het apparaat de media nog aan het mounten is.
In het laatste geval, optische media, wacht tot de media correct door het station is gemount. In de meeste gevallen kunt u dit volgen door te kijken naar het LED-gedrag van uw CD/DVD/BD/HD DVD-station. Er zijn gevallen waarin de CD / DVD / BD / HD DVD -lezer de media niet meer mount omdat deze onherkenbaar is! Als het station de media niet mount, kan IsoBuster de media uiteraard ook niet benaderen.
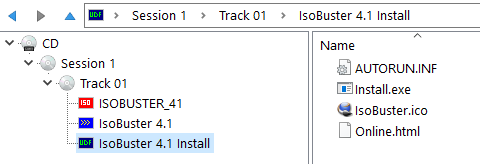
Een voorbeeld van wat u kunt zien :
Voor meer informatie over track- en session-indelingen.
Voor meer informatie over Bestandssystemen, wat ze zijn, waarom verschillende maar identieke, ...
Voor meer informatie over Imagebestanden.